
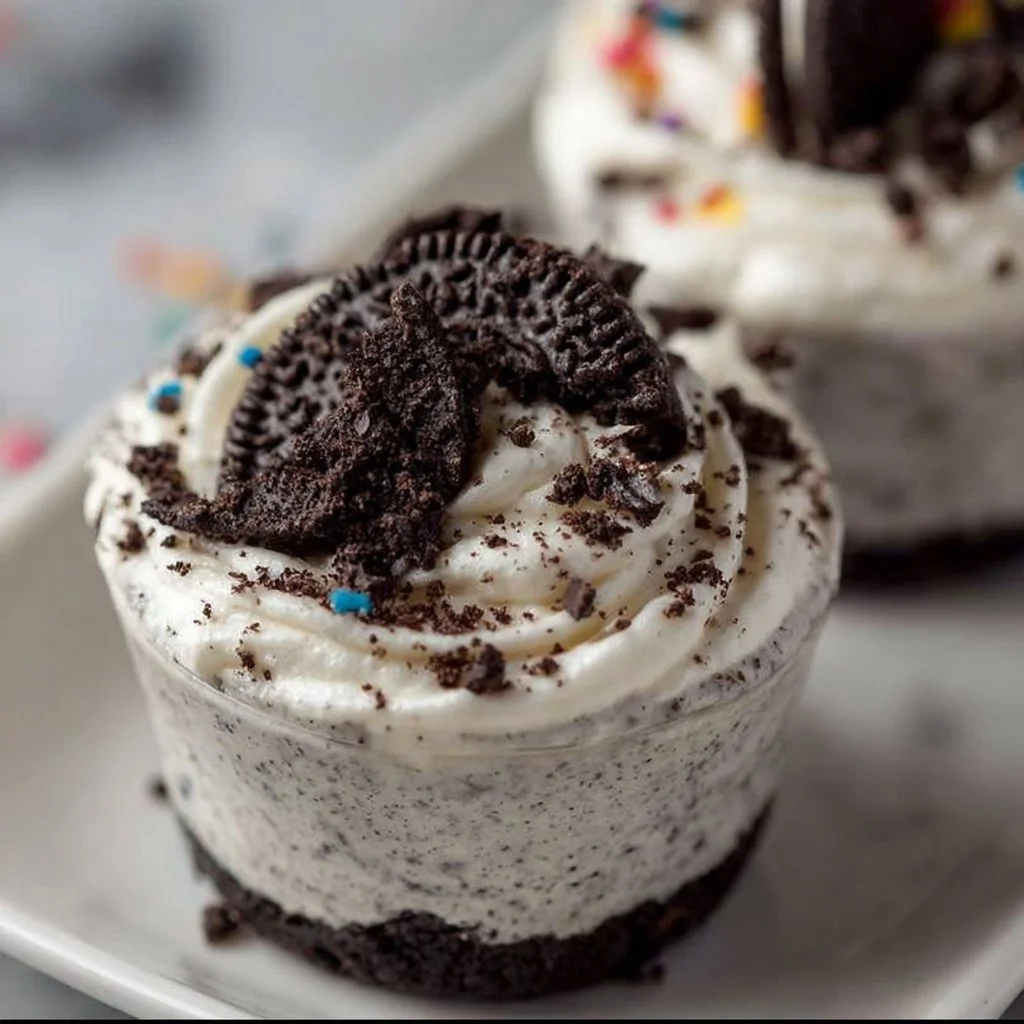
Oreo No-Bake Cheesecake Cups: Irresistible & Easy Dessert Delight
Hey there, fellow food lovers! Get ready to dive into a dessert that is as delightful to make as it is to eat—Oreo No-Bake Cheesecake Cups! If you’re anything like me, Oreos hold a special place in your heart and pantry. They take us back to our childhood, where they were the go-to treat. Now, imagine transforming that classic cookie into a light and creamy cheesecake that doesn’t even require an oven. Pure bliss, right?
Picture this: it’s a hot summer day, and the last thing you want to do is turn on your oven. You’ve invited friends over, and you want to impress them with something scrumptious, but you also don’t want to spend hours in the kitchen. Enter this no-bake cheesecake. With just a handful of ingredients that you probably already have at home, you can whip up these adorable little cups of joy without breaking a sweat.
The best part? They are customizable and can be made ahead of time, leaving you free to kick back and enjoy your company. Ready to dig in? Let’s get started on this sweet adventure with a cheesecakey twist that’s sure to have you and your guests asking for more.
Personal Story
I still remember the first time I made a no-bake cheesecake. It was a warm afternoon in my childhood kitchen, and I was rummaging through the pantry when I stumbled upon a package of Oreos. My mom was busy prepping dinner, and I thought, “What if I combined these with that creamy filling I sometimes see in those fancy desserts?” So, like any daring young chef, I set out to create my masterpiece.
After a bit of trial and error—and some sneaky bites of raw filling (side note: highly recommend)—I finally crafted a version of my own no-bake cheesecake. I even convinced my younger siblings to help crush those Oreos, and let me tell you, we had a blast. The moment we tasted that sweet, creamy filling paired with the crunchy cookie base was pure magic. Everyone loved it! It became our go-to dessert, especially for family gatherings. Over the years, I’ve refined the recipe to this dazzling little treat we’re making today, but the nostalgic joy of creating it with family lives on.
Ingredients
Here’s what you’ll need to make these delicious Oreo No-Bake Cheesecake Cups:
-
1 8 oz block of cream cheese, softened
- This is the star of the show! It gives that rich, creamy texture that cheesecake lovers adore. If you’re looking for a lighter option, consider using low-fat cream cheese or even a dairy-free alternative like cashew cream.
-
1 8 oz container of Cool Whip (or whipped topping)
- This is what keeps the cheesecake light and fluffy. If you prefer homemade, you can whip heavy cream to soft peaks and gently fold it in. Just remember, you’ll be bypassing those handy shortcuts!
-
2/3 cup powdered sugar
- This sweetens our mixture while also keeping things smooth. In a pinch, you can use granulated sugar; just be sure to mix it well to dissolve those granules.
-
1 teaspoon vanilla extract
- Trust me, vanilla elevates everything! If you want to get whimsical, consider using almond extract for a totally different flavor profile.
-
24-26 Oreo cookies (more if desired)
- Crunchy, chocolatey goodness! Use regular Oreos for the classic taste, or have fun with flavors like double-stuffed or mint for a twist. Gluten-free Oreos are also available if you have dietary restrictions.
Step-by-Step Instructions
Alright, it’s time to roll up your sleeves and get cooking!
-
Prepare the Cream Cheese: Start with the cream cheese—the cubes should be soft enough to blend easily. This is important! If your cream cheese is cold, it will create lumps in your filling. You can speed up this process by cutting it into smaller pieces and letting it sit at room temperature for about 30 minutes.
-
Mix the Cream Cheese and Sugar: In a mixing bowl, combine the softened cream cheese and powdered sugar. Use a hand mixer or stand mixer on medium speed. Mix until the mixture is smooth and creamy—about 2-3 minutes. It’s crucial to scrape down the sides of the bowl midway to ensure an even blend. If you’re feeling fancy, you can add a pinch of salt to enhance the flavors!
-
Incorporate the Vanilla: Add the vanilla extract to help sweeten and flavor the cheesecake base. Mix again until everything is well combined. At this point, take a moment to appreciate how good it smells. Ah, the magic of vanilla!
-
Fold in the Cool Whip: Now for the fun part! Gently fold in the Cool Whip, incorporating it thoroughly but without deflating all that wonderful air you’ve whipped in. Use a spatula and fold from the bottom up, turning the bowl as you go. This should take about a minute.
-
Prepare the Oreo Crust: While your filling is coming together, grab 10-12 Oreos (depending on how cookies-heavy you want it) and crush them into tiny pieces. You can do this in a food processor or by placing them in a zip-top bag and giving them a good whack with a rolling pin. Aim for a mix of fine crumbs and larger chunks for texture.
-
Layer the Cups: Grab your cups or bowls—fun jars work wonderfully too! Start with a layer of crushed Oreos at the bottom, then spoon in a layer of your cheesecake mixture on top. Repeat layers until you fill the cup, ending with a sprinkling of Oreo crumbs on top for a fab presentation.
-
Chill: Place those beauties in the refrigerator for at least 4 hours to set. You can even make them a day ahead for a stress-free treat the next day!
-
Serve and Enjoy!: When you’re ready to serve, you can use some additional whipped topping on top for that extra creamy touch. Dive in with a spoon, and feel that satisfaction as those layers of flavor unfold!
Serving Suggestions
Plate these lovely Oreo No-Bake Cheesecake Cups with a small mint leaf on top for a pop of color. Consider pairing them with some fresh berries for a burst of freshness—strawberries or raspberries are excellent choices. And don’t forget the coffee or milk on the side; nothing pairs quite like a dessert and a comforting drink!
Recipe Variations
-
Peanut Butter Twist: Add 1/2 cup of peanut butter to the cheesecake filling for a classic combo.
-
Minty Fresh: Use mint Oreos and add a drop of peppermint extract to the filling for a peppermint cheesecake dream.
-
Chocolate Lovers: Mix in melted chocolate or cocoa powder to the filling for an extra-chocolatey experience.
-
Fruity Delight: Layer in some fruit puree, like strawberries or blueberries, between the cheesecake layers.
-
Nutty Crunch: Fold in some chopped nuts like walnuts or pecans to give the cheesecake a delightful crunch.
Chef’s Notes
This no-bake cheesecake recipe has evolved since that sunny afternoon in my childhood kitchen. I love experimenting with different flavors and layers, and each time I make it, I discover something new. If you find yourself eating a little too much of that filling while you’re preparing, trust me, you’re not alone! There have been countless times when I’ve caught myself with a spoon directly in the bowl—not that I’m complaining!
Also, if you want to impress your friends even more, try serving the cups in individual jars. It adds that special touch that feels stylish yet approachable!
FAQs and Troubleshooting
-
Why is my cheesecake filling not smooth?
- This is usually due to not softening the cream cheese enough. Make sure it’s at room temperature before mixing!
-
How long can I keep these cupcakes?
- They’ll last for about a week in the fridge, but I bet they won’t make it that long!
-
Can I use a different topping?
- Absolutely! Feel free to top them with fruit, chocolate sauce, or caramel for a unique twist.
-
What if my filling is too firm?
- If it’s too stiff, try folding in a little more whipped topping or heavy cream until you get the desired consistency.
Nutritional Info
Calories per serving: approximately 320
Fat: 20g | Carbohydrates: 27g | Protein: 4g | Sugars: 18g
And there you have it, my fellow kitchen adventurers—Oreo No-Bake Cheesecake Cups that are simple yet flavorful! I hope you’re excited to give this recipe a try in your own kitchen. Share your creations, and let’s celebrate those small moments of joy that food brings! Happy cooking!
PrintOreo No-Bake Cheesecake Cups

Delight in these light and creamy Oreo No-Bake Cheesecake Cups, perfect for summer gatherings without the need for an oven.
- Prep Time: 15 minutes
- Cook Time: 0 minutes
- Total Time: 240 minutes
- Yield: 4 servings 1x
- Category: Dessert
- Method: No-Bake
- Cuisine: American
- Diet: Vegetarian
Ingredients
- 1 8 oz block of cream cheese, softened
- 1 8 oz container of Cool Whip (or whipped topping)
- 2/3 cup powdered sugar
- 1 teaspoon vanilla extract
- 24–26 Oreo cookies (more if desired)
Instructions
- Prepare the cream cheese: Start with the cream cheese—the cubes should be soft enough to blend easily.
- Mix the cream cheese and sugar: In a mixing bowl, combine the softened cream cheese and powdered sugar. Mix until smooth and creamy.
- Incorporate the vanilla: Add the vanilla extract and mix until well combined.
- Fold in the Cool Whip: Gently fold in the Cool Whip until thoroughly combined.
- Prepare the Oreo crust: Crush 10-12 Oreos into tiny pieces for the crust.
- Layer the cups: Start with a layer of crushed Oreos at the bottom, then spoon in a layer of the cheesecake mixture on top, and repeat layers.
- Chill: Refrigerate for at least 4 hours to set.
- Serve and enjoy!: Optionally top with additional whipped topping and enjoy with a spoon.
Notes
These cups can be made ahead of time and are perfect for hot summer days.
Nutrition
- Serving Size: 1 cup
- Calories: 320
- Sugar: 18g
- Sodium: 200mg
- Fat: 20g
- Saturated Fat: 10g
- Unsaturated Fat: 8g
- Trans Fat: 0g
- Carbohydrates: 27g
- Fiber: 1g
- Protein: 4g
- Cholesterol: 50mg
Keywords: Oreo, cheesecake, no-bake dessert, easy dessert, summer treat