
Indulge in Decadence: Homemade Vanilla Caramel Creams Recipe
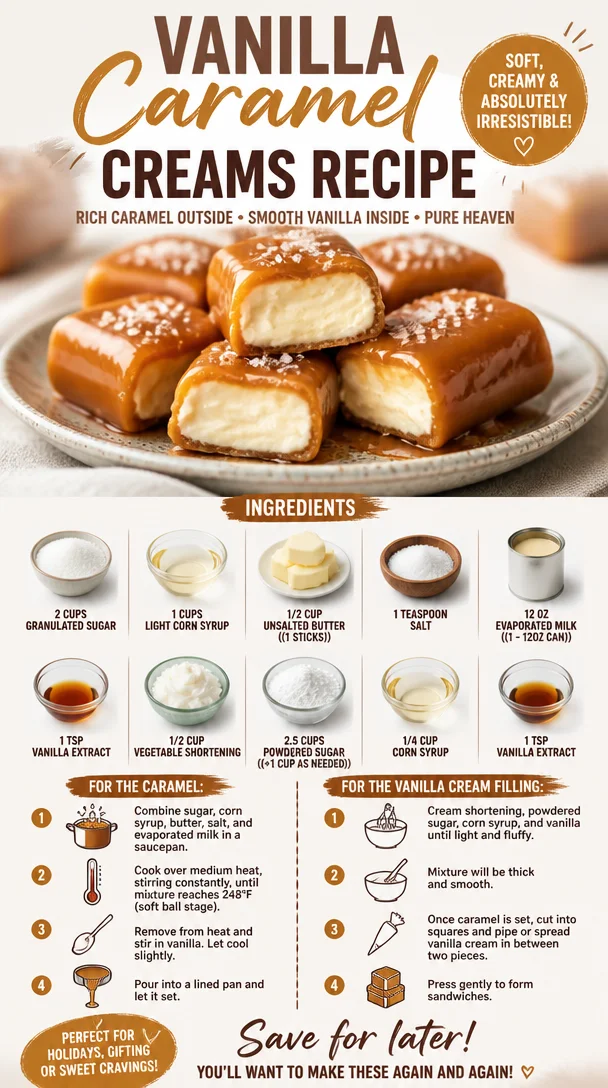
Hey there, culinary adventurers! Today, I’m inviting you into my kitchen where sweet dreams become tasty realities. If you’re looking for a major crowd-pleaser or a great way to spoil yourself, let me introduce you to a little piece of heaven: Vanilla Caramel Creams! These treats are a delightful combination of soft, creamy vanilla and rich caramel that will have you and your loved ones swooning with every bite.
A Sweet Slice of Nostalgia
Growing up, I spent countless afternoons at my grandmother’s house, where the aroma of sweets wafted through the air like an invitation. One day, while flipping through her stack of vibrant recipe cards, I stumbled upon a scribbled note about Vanilla Caramel Creams. It struck a chord deep within me—it was the same recipe she whispered to me while we stirred cocoa in a pot, the same one she made for family gatherings, complete with happy chaos and laughter.
As I made these candies for the first time in my own kitchen, I could practically hear her voice guiding me, instructing me on how to get that smooth texture just right and the secret to achieving the perfect sweetness. These caramel creams aren’t just a dessert; they carry a beautiful story, one that connects generations through the joy of cooking and sharing.
Let’s turn that nostalgic memory into your next kitchen adventure!
Ingredients You’ll Need
To whip up these delightful Vanilla Caramel Creams, gather the following ingredients:
-
2 cups granulated sugar
A key ingredient for sweetness and that lovely caramelization. If you’re looking to reduce sugar, coconut sugar can be a fun substitute, although it will alter the flavor slightly. -
1 cup light corn syrup
This helps in both sweetness and preventing crystallization, giving those creams a silky texture. You can try using agave syrup if you’re aiming for a natural twist. -
1/2 cup unsalted butter (1 stick)
The butter makes everything richer and adds creaminess. If you’re looking for a dairy-free option, coconut oil works well here. -
1 teaspoon salt
A pinch of salt enhances all the flavors; don’t skip it! If you’re on a low-sodium diet, you can reduce it to just a dash. -
12 oz evaporated milk (1 – 12 oz can)
This is the magic ingredient that gives the creams their luscious, creamy texture. You can substitute it with coconut milk for a dairy-free alternative, but do ensure it’s unsweetened. -
1 teaspoon vanilla extract
The star of our show! It brings that warming flavor that complements the caramel beautifully. If you have vanilla bean paste, that would offer an even richer taste. -
1/2 cup vegetable shortening
This helps achieve that perfect texture for the creams. A vegan butter substitute can also work as a great alternative. -
2.5 cups powdered sugar (+1 cup as needed)
This adds the sweetness and forms the body of your cream. You can sift it to prevent lumps or use a powdered sugar substitute for a lighter version. -
1/4 cup corn syrup
This assists in adding stickiness and delightfully chewy texture to the final product. Honey can work if you’re after a different sweet flavor. -
1 teaspoon vanilla extract
Yep, just like above! Don’t skimp—great vanilla makes a big difference in flavor.
Step-by-Step Instructions
Let’s get to the fun part—cooking! Follow these steps, and soon you’ll have a delightful batch of Vanilla Caramel Creams.
-
Prepare Your Workstation
Start by greasing a 9×13-inch baking dish or line it with parchment paper. This helps the caramel to easily release once it’s cooled. Trust me, this step is rewarding when it comes to slicing. -
Combine Sugar and Corn Syrup
In a medium saucepan over medium heat, mix together the granulated sugar and light corn syrup. Stir continuously until the sugar dissolves completely. You want to keep an eye on this mixture; it can go from good to burnt in a heartbeat. -
Add Butter and Salt
Next, add the unsalted butter and salt to the pot. Stir until the butter melts and integrates well with the sugar syrup. This combination is the sort of warm hug we all need on a chilly day! -
Bring to a Boil
Increase the heat to medium-high, allowing the mixture to reach a gentle boil. Keep stirring regularly to ensure it doesn’t stick or scorch at the bottom. We want smooth, velvety caramel, not crunchy bits! -
Mix in Evaporated Milk
Once you reach a rolling boil, carefully stir in the evaporated milk. Be cautious; it may bubble up. Continue stirring and allow it to return to a boil. This is the moment where that rich, creamy texture develops! -
Cook Until Golden
Reduce the heat to medium and let it simmer for about 5-10 minutes, stirring consistently. The mixture will start to thicken. Boil until it reaches a soft-ball stage (around 234°F or 112°C), using a candy thermometer if you have one. This step is crucial; you want that soft yet firm bite! -
Add Vanilla Extract
Off the heat, stir in that precious vanilla extract. The aroma will be intoxicating—seriously, you might want to just dive right in! -
Transfer to Dish
Pour the caramel mixture into the greased baking dish. Spread it out evenly. Allow it to cool at room temperature for at least an hour. Once it’s set, you can pop it in the fridge for a quicker set. -
Make Vanilla Cream Filling
In a mixing bowl, beat the vegetable shortening and 1 teaspoon of vanilla extract until it’s fluffy. Gradually add in the powdered sugar until smooth. If the mixture is too thick, you can add a teaspoon of corn syrup to lighten it up. -
Slice Your Caramels
Once the caramel has completely cooled, cut it into small squares or rectangles. Now it’s time to sandwich! Spread a bit of that creamy filling between two caramel squares, creating little bites of joy. -
Dust with Powdered Sugar
Lightly dust the finished Vanilla Caramel Creams with extra powdered sugar to avoid stickiness. This is where presentation comes into play!
Serving Suggestions
To serve these creamy delights, arrange them on a pretty plate, adding a few fresh berries or a sprig of mint for a pop of color. You can even drizzle some melted chocolate on top for an extra indulgent touch! These Vanilla Caramel Creams make for an excellent homemade gift, perfectly tucked into a decorative box for the sweet tooth in your life.
Recipe Variations
Feel like mixing things up? Here are some fun twists on this classic recipe:
-
Salted Caramel Variation: Add a sprinkle of flaky sea salt on top of the caramel layer for that sweet-and-salty experience.
-
Nutty Flavor: Incorporate chopped nuts, like pecans or walnuts, into the caramel before it sets for a tasty crunch.
-
Chocolate Coating: Dip the finished creams in melted chocolate for a chocolate-covered version that will have everyone begging for more!
-
Peppermint Twist: Add a few drops of peppermint extract instead of vanilla for a festive version around the holidays.
-
Fruit Flavors: Mix in a bit of fruit puree (like raspberry or strawberry) into your cream filling for a fruity surprise.
Chef’s Notes
Reflecting on my journey, I love how this recipe has evolved over time. The Vanilla Caramel Creams I initially learned featured an entirely different filling, and they were delicious, but tweaking those flavors to create something new and personal made me realize that cooking is as much about creativity as it is about tradition. And let’s not forget the numerous times I’ve had to salvage a batch when I accidentally turned the heat up too high! Those kitchen disasters often led to unexpected flavors that became fan favorites, and that’s what keeps me inspired!
FAQs and Troubleshooting
-
Why did my caramel crystallize?
Caramel can crystallize if sugar crystals form on the sides of the pan. To prevent this, wash down the sides with a wet pastry brush while cooking. Also, don’t stir the mixture once it’s bubbling. -
How can I fix a too-thick caramel?
If your caramel is too thick, it likely cooked too long. To salvage it, return it to the heat with a splash of water or cream and stir until you reach the desired consistency. -
What if my vanilla cream filling is too thick?
If your filling turns out too thick to spread, simply add a drizzle of corn syrup or a little milk to loosen it up, mixing until smooth. -
How long can I store these Vanilla Caramel Creams?
These treats will keep in an airtight container at room temperature for up to two weeks. Refrigeration can change the texture, so stick to the counter for best results!
It’s time to get started on making these Vanilla Caramel Creams! I hope these treats bring as much joy to your kitchen as they have to mine. Remember—cooking is about having fun, so don’t sweat the small stuff. Turn up your favorite playlist, unleash your inner chef, and enjoy the process. Happy cooking!
PrintHomemade Vanilla Caramel Creams
Indulge in these delightful Vanilla Caramel Creams, a nostalgic treat combining soft vanilla and rich caramel flavors.
- Prep Time: 15
- Cook Time: 30
- Total Time: 45
- Yield: 16 servings 1x
- Category: Candy
- Method: Stovetop
- Cuisine: American
- Diet: Vegetarian
Ingredients
- 2 cups granulated sugar
- 1 cup light corn syrup
- 1/2 cup unsalted butter (1 stick)
- 1 teaspoon salt
- 12 oz evaporated milk (1 – 12 oz can)
- 1 teaspoon vanilla extract
- 1/2 cup vegetable shortening
- 2.5 cups powdered sugar (+1 cup as needed)
- 1/4 cup corn syrup
- 1 teaspoon vanilla extract
Instructions
- Prepare your workstation by greasing a 9×13-inch baking dish or lining it with parchment paper.
- Combine the granulated sugar and light corn syrup in a medium saucepan over medium heat.
- Add the unsalted butter and salt to the pot, stirring until melted.
- Bring the mixture to a gentle boil, stirring regularly.
- Mix in the evaporated milk carefully and allow it to return to a boil.
- Cook until golden, reducing heat and simmering for about 5-10 minutes.
- Add vanilla extract off the heat and stir well.
- Transfer the caramel mixture into the greased baking dish and spread it evenly.
- Make the vanilla cream filling by beating vegetable shortening and vanilla extract until fluffy.
- Slice the caramel into squares or rectangles and sandwich with the filling.
- Dust the finished Vanilla Caramel Creams with extra powdered sugar.
Notes
These treats can be stored in an airtight container at room temperature for up to two weeks.
Nutrition
- Serving Size: 1 piece
- Calories: 150
- Sugar: 20g
- Sodium: 150mg
- Fat: 5g
- Saturated Fat: 2g
- Unsaturated Fat: 3g
- Trans Fat: 0g
- Carbohydrates: 25g
- Fiber: 0g
- Protein: 1g
- Cholesterol: 20mg
Keywords: Vanilla Caramel, Candy, Desserts, Homemade Treats, Sweet Recipes