

Spring Blossom Cookies: Taste the Sunshine!
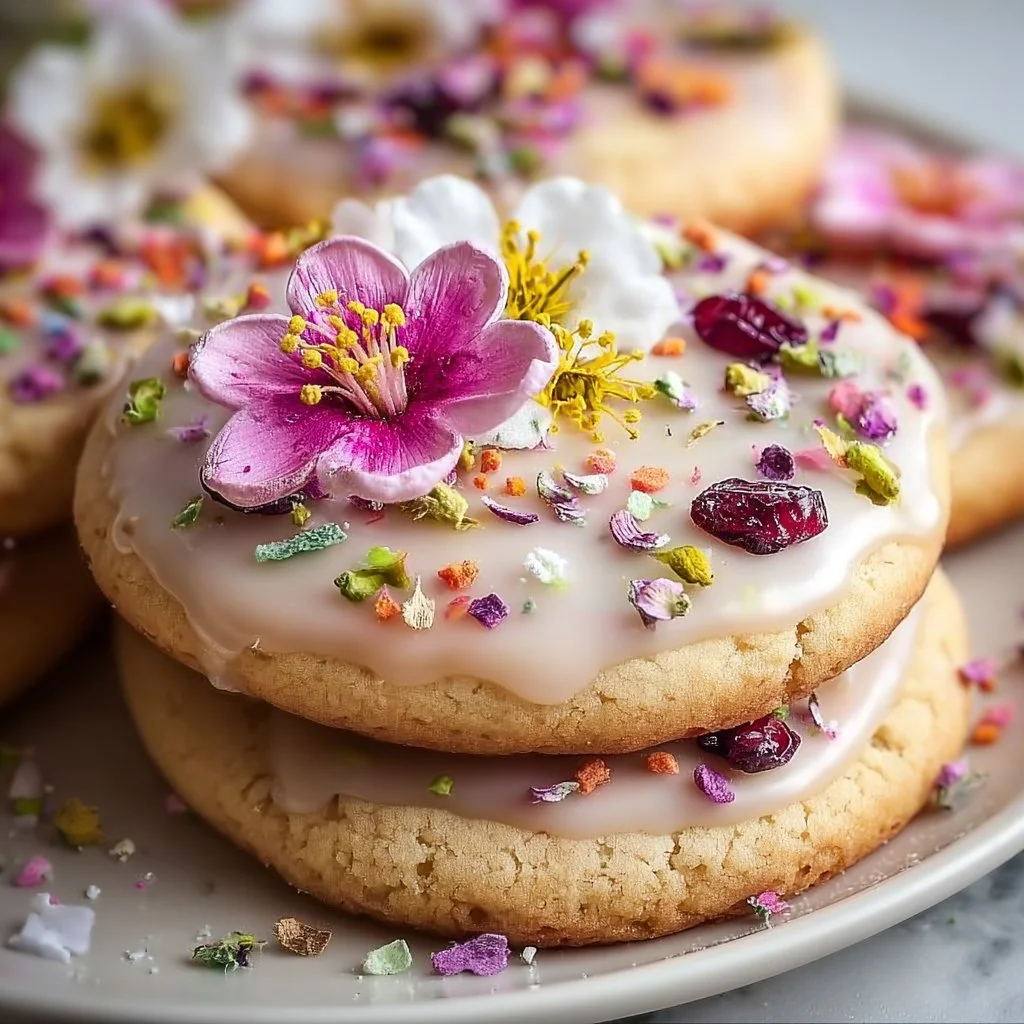
Hello, fellow foodies! As the days grow longer and the world bursts into color, there’s no better way to celebrate spring than with a delightful batch of Spring Blossom Cookies. Imagine sinking your teeth into a soft, buttery cookie, infused with warm vanilla and a hint of sweetness, adorned with vibrant colors and sprinkles that mirror the bright blossoms all around us. Baking these cookies isn’t just about making a treat; it’s about creating a moment, capturing the essence of springtime in each bite.
These cookies are the perfect companion for sunny afternoons, garden parties, or simply a cozy night in with a good book (and a glass of milk, of course!). Plus, they’re incredibly easy to whip up, making them a fantastic option for both seasoned bakers and those just starting their culinary journeys. As we dive into this recipe, I’ll share some personal stories, handy tips, and a sprinkle of culinary magic to help you create cookies that will have everyone asking for seconds.
So, grab your mixing bowl, preheat that oven, and let’s channel that springtime spirit with every bite of these delicious cookies!
Personal Story
Growing up, spring was always a magical time in my household. The air was filled with the sweet scent of blooming flowers, and the sound of laughter would echo throughout the neighborhood as children darted in and out of backyards, playing tag and celebrating the warmth of the sun. One of my fondest memories is of my grandmother and me baking cookies together in her tiny kitchen, which always felt like a cozy haven filled with love and laughter.
Every spring, we’d set aside an afternoon to make her famous blossom cookies. With flour dusting our noses and buttercream icing coating our fingertips, we’d craft colorful cookies adorned with sprinkles. I remember watching her melt butter in a bowl, the rich aroma wafting through the air, igniting my curiosity and passion for baking. I loved how such simple ingredients could transform into something beautiful and delicious.
Now, when I bake these Spring Blossom Cookies, I’m reminded of those moments spent with my grandmother—how our small kitchen felt lively, filled with the simplest joys of life. It’s that same joy I want to share with you all today, to create a cookie that captures not just flavors but memories as well.
Ingredients
Here’s what you’ll need to create your own delightful Spring Blossom Cookies:
-
2 1/2 cups all-purpose flour
The backbone of the cookie! All-purpose flour provides the structure needed for those beautiful blooms. If you’re looking for a gluten-free alternative, almond flour works wonderfully, though the texture will be slightly different. -
1 teaspoon baking powder
This little guy is your leavening agent, helping your cookies rise and become fluffy. Don’t confuse it with baking soda, as each has its own distinct role in baking. -
1/2 teaspoon salt
A touch of salt brings out the sweetness in our cookies and balances the flavors. It’s essential, so don’t skip it! -
1 cup unsalted butter (softened)
Butter adds richness and depth to the cookie. Be sure to let it soften at room temperature for that perfect creamy texture. While I prefer unsalted to maintain control over the saltiness, salted butter can be used—just reduce the added salt slightly. -
1 cup granulated sugar
This is the sweet base for our cookies! If you’re looking for a refined alternative, coconut sugar is a great substitute, bringing a hint of caramel flavor. -
1/2 cup powdered sugar
Powdered sugar adds extra sweetness and a lovely melt-in-your-mouth texture. You can use regular sugar in a pinch, but the cookies won’t be as beautifully tender. -
1 large egg
Eggs provide moisture and richness. For a vegan option, you can swap it out for a mashed banana or unsweetened applesauce, though the cookies may have a slightly different flavor. -
1 teaspoon vanilla extract
Ah, the magic ingredient! Vanilla enhances the overall flavors for that nostalgic cookie taste. You can experiment with almond extract for a different twist if you’d like! -
Food coloring (optional)
Want to step up your cookie game? A few drops of food coloring can transform these cookies into a colorful masterpiece, perfect for spring festivities! -
Sprinkles for decoration (optional)
Because what’s a spring cookie without some bright, cheerful sprinkles? Feel free to use your favorites—nonpareils, jimmies, or even decorative sugar for a bit of extra flair!
Step-by-Step Instructions
Now that we have our ingredients gathered, let’s dive into the step-by-step process of creating these stunning Spring Blossom Cookies!
Step 1: Prep Your Kitchen
Preheat your oven to 350°F (175°C) and line a baking sheet with parchment paper. This preparation ensures even baking and easy cleanup—trust me, it’s a game-changer!
Step 2: Mix the Dry Ingredients
In a medium bowl, whisk together the all-purpose flour, baking powder, and salt until well combined. This step helps distribute the baking powder evenly throughout the flour, ensuring your cookies rise beautifully. Set it aside and inhale the sweet scent of spring already wafting through your kitchen.
Step 3: Cream the Butter and Sugars
In a large mixing bowl, cream together softened unsalted butter, granulated sugar, and powdered sugar using an electric mixer. Mix on medium speed for about 2-3 minutes until the mixture is light and fluffy. This aeration is crucial for creating a tender cookie. Make sure to scrape down the sides to capture every bit of sweetness!
Step 4: Add the Egg and Vanilla
Once your butter and sugar are creamily combined, add in the large egg and vanilla extract. Beat them together until everything is well incorporated. The mixture should be smooth and velvety—this is where we add a splash of personality!
Step 5: Combine Dry and Wet Ingredients
Gradually add your dry flour mixture to the wet mixture, mixing on low speed. Avoid overmixing to ensure your cookies don’t become tough. Fold in with a spatula if necessary until no dry bits remain. If you want to add food coloring, now is the time to fold it in for beautiful hues!
Step 6: Shape the Cookies
Using a cookie scoop or your hands, form tablespoon-sized balls of dough and place them on your prepared baking sheet, leaving space between them. If you’re feeling fancy, gently press down in the center of each ball to create a small indent for the sprinkles to rest.
Step 7: Sprinkle the Love
If you’re using sprinkles, now’s the time to adorn your cookies! Add a few sprinkles on top of each dough ball, pressing them gently into the surface to ensure they stick.
Step 8: Bake
Pop your tray in the oven and bake for 10-12 minutes, or until the edges are just lightly golden. Remove them from the oven and let them cool on the baking sheet for about 5 minutes before transferring them to a wire rack to cool completely. This cooling time helps them set up perfectly!
Step 9: Enjoy
Once your Spring Blossom Cookies have cooled, grab a plate, set them out, and watch as everyone gathers around to admire and, of course, taste these beautiful creations!
Serving Suggestions
Presentation is key when it comes to showcasing your lovely cookies! Place them on a colorful platter or cake stand to highlight their cheerful hues. Add a sprinkle of fresh flowers or a few green leaves around the base for a charming spring vibe. These cookies pair wonderfully with a cup of tea, a refreshing glass of lemonade, or a cozy bowl of ice cream for a delightful dessert twist!
Recipe Variations
Feel free to get creative with your Spring Blossom Cookies! Here are a few ideas to mix things up:
-
Citrus Zest: Add zest from oranges or lemons to the dough for a zesty pop of flavor.
-
Nutty Twists: Incorporate chopped nuts like walnuts or pecans for extra crunch and depth.
-
Chocolate Dips: After baking and cooling, dip half of the cookie in melted chocolate for an indulgent treat.
-
Savory Take: Swap half the granulated sugar for brown sugar and add a pinch of cinnamon for a unique spin.
-
Gluten-Free: Use a 1:1 baking blend for a gluten-free version, ensuring everyone can join in the fun!
Chef’s Notes
As I’ve made these Spring Blossom Cookies over the years, I’ve learned a few tricks! One of my favorite “hacks” is to chill the dough for about 30 minutes before shaping it into balls. This little extra step enhances the flavor and helps your cookies hold their shape better—perfect for decorating or just classic cookie look!
And let’s not overlook those sprinkles! Finding the perfect mix of colors and shapes always feels like a creative endeavor. I once overdid it with sprinkles for a cookie exchange, resulting in a sprinkle explosion that had everyone chuckling. It was a sweet mess, but it made for some memorable cookies (and photos)!
FAQs and Troubleshooting
1. Why are my cookies flat?
Flat cookies can happen if your butter was too warm or if you accidentally skipped the baking powder. Make sure your butter is just softened, not melted, and that you mixed in the right amount of baking powder!
2. Can I freeze the cookie dough?
Absolutely! You can chill the dough for about 30 minutes, then scoop into balls and freeze them. When you’re ready to bake, pop them straight from the freezer into the oven—just add a couple of extra minutes to the baking time!
3. What if my cookies come out too tough?
Overmixing is the main culprit for tough cookies. Mix until just combined and avoid letting your mixture sit for too long before baking. Also, make sure you’re measuring your flour correctly—spoon it lightly into the measuring cup rather than scooping directly.
4. How do I store these cookies?
Keep your Spring Blossom Cookies in an airtight container at room temperature for up to a week. If you want to prolong their life, you can freeze them for a few months. (But trust me, they won’t last that long!)
Nutritional Info (Optional)
While indulging is key, it’s always good to keep an eye on nutritional value! Each cookie contains approximately:
- Calories: 150
- Total Fat: 7g
- Saturated Fat: 4g
- Cholesterol: 20mg
- Sodium: 75mg
- Total Carbohydrates: 22g
- Sugars: 10g
- Protein: 1g
Feel free to adjust serving sizes and ingredients to fit your dietary needs.
And there you have it, my lovely food lovers! With Spring Blossom Cookies, you’re not just making a treat—you’re inviting joy and sunshine into your kitchen. So, roll up those sleeves, turn on your favorite tunes, and let’s bake something great together! Happy baking! 🌼
PrintSpring Blossom Cookies

Celebrate spring with delightful Spring Blossom Cookies, soft and buttery with vanilla and colorful sprinkles.
- Prep Time: 15 minutes
- Cook Time: 12 minutes
- Total Time: 27 minutes
- Yield: 24 cookies 1x
- Category: Dessert
- Method: Baking
- Cuisine: American
- Diet: Vegetarian
Ingredients
- 2 1/2 cups all-purpose flour
- 1 teaspoon baking powder
- 1/2 teaspoon salt
- 1 cup unsalted butter (softened)
- 1 cup granulated sugar
- 1/2 cup powdered sugar
- 1 large egg
- 1 teaspoon vanilla extract
- Food coloring (optional)
- Sprinkles for decoration (optional)
Instructions
- Prep your kitchen by preheating your oven to 350°F (175°C) and lining a baking sheet with parchment paper.
- Mix the dry ingredients by whisking together the flour, baking powder, and salt in a medium bowl.
- Cream the butter and sugars in a large mixing bowl using an electric mixer until light and fluffy.
- Add the egg and vanilla to the butter mixture and beat until well incorporated.
- Combine the dry and wet ingredients gradually, mixing on low speed to avoid overmixing.
- Shape tablespoon-sized balls of dough and place them on the prepared baking sheet.
- Sprinkle the cookies with colorful sprinkles if desired.
- Bake for 10-12 minutes until the edges are lightly golden.
- Enjoy the cookies once they’ve cooled down on a wire rack!
Notes
Chilling the dough for 30 minutes before shaping helps enhance flavor and cookie shape.
Nutrition
- Serving Size: 1 cookie
- Calories: 150
- Sugar: 10g
- Sodium: 75mg
- Fat: 7g
- Saturated Fat: 4g
- Unsaturated Fat: 2g
- Trans Fat: 0g
- Carbohydrates: 22g
- Fiber: 0g
- Protein: 1g
- Cholesterol: 20mg
Keywords: spring cookies, blossom cookies, easy cookie recipes