Easy Kiwi Jam Recipe: A Sweet Journey to Flavorful Delights
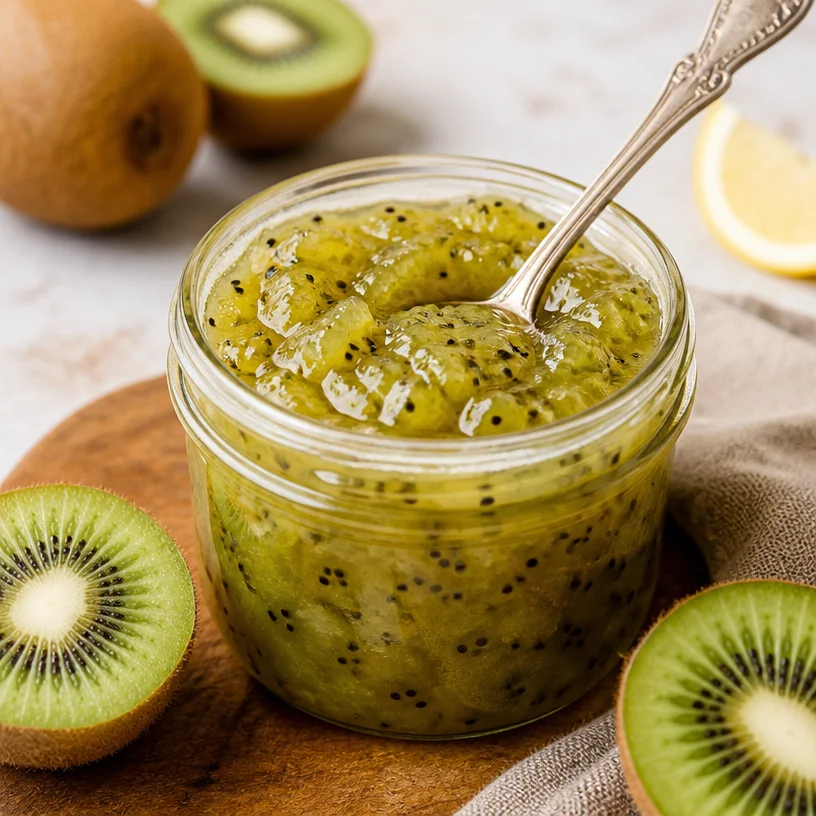
Welcome to my kitchen, friend! Today, we’re diving into the world of fruity spreads with an easy kiwi jam recipe that will have your taste buds dancing and your toast singing. I couldn’t be more excited to share this fantastic creation with you. This sweet and tangy delight is perfect for slathering on your morning bagel, pairing with cheese for a delightful charcuterie board, or simply enjoying by the spoonful right from the jar. Ready to awaken your inner jam maker? Let’s get cooking!
A Taste of Nostalgia: My Kiwi Jam Journey
Before I dive into the recipe, let me take you down memory lane. When I was a kid, my family had a small garden filled with all sorts of fruits and vegetables, but the kiwis always took the spotlight. These vibrant green gems would cling to their vines, tantalizing us with their sweetness, and I remember the day my grandmother decided it was time to make some jam.
I watched in awe as she transformed our freshly picked kiwis into a luscious spread. The kitchen was filled with the sweet aroma of cooking fruit and sugar, a scent that promised homemade goodness. I loved the vibrant color and texture of the freshly made kiwi jam as she poured it into jars, sealing in those memories for us to enjoy for the months ahead.
Fast forward to today, and I can’t help but recreate that same joy in my kitchen. This easy kiwi jam recipe is a true ode to those memories, and I hope it sparks joy and warmth wherever you share it.
Ingredients
Now that we’re feeling all sentimental, let’s gather what we need to bring this kiwi jam to life. Here’s a quick rundown of the essential ingredients:
-
2 Pounds Kiwis: The star of the show! These little green fruits are packed with flavor and nutrients. When selecting kiwis, look for slightly soft ones with a vibrant color. If you can’t find fresh kiwis, frozen ones work too, just remember to thaw and drain excess liquid.
-
2 Cups Sugar: This is what transforms those tangy kiwis into a sweet, spreadable harmony. You can adjust the sugar to taste—less if you prefer a more natural taste or substitute with honey or maple syrup for a different twist.
-
1 Tablespoon Lemon Juice: This adds brightness and helps preserve the jam. Fresh is best, but bottled lemon juice can also work in a pinch. It’s a little trick to keep everything fresh and vibrant!
Step-by-Step Instructions to Kiwi Jam Bliss
Ready to get your hands fruity? Let’s jump into the step-by-step magic of making this delightful kiwi jam. Grab your apron, and let’s turn those ripe kiwis into a jar of happiness!
-
Prepare the Kiwis: Start by peeling your kiwis and chopping them into small chunks. Don’t stress about making them perfect; uneven pieces add a bit of charm to the jam. While you’re at it, take a moment to admire their gorgeous green color. It’s worth a little pause!
-
Maceration Magic: In a large bowl, combine the chopped kiwis with the sugar. Give it a gentle toss so every piece gets a good coating of sweetness. Let this mixture sit for about 30 minutes. You’ll notice the sugar draws out some of the juices from the kiwis—this is exactly what we want! It’s nature’s way of creating the syrupy goodness we need for our jam.
-
Cook It Down: Transfer the kiwi-sugar mixture to a medium-sized pot and turn the heat to medium. Add the tablespoon of lemon juice, and stir everything together. As the mixture heats up, you’ll hear it start to bubble. Keep an eye on it and stir occasionally to prevent sticking.
-
Simmer and Thicken: Allow it to simmer for about 20–30 minutes. You’ll want to see it thicken up; it’s ready when a spoonful drizzles off with a nice viscosity. If you want a smoother texture, feel free to use an immersion blender or standard blender for a quick pulse. Just be careful with the hot mixture!
-
Check for Jam Consistency: To test if your jam is done, drop a spoonful onto a chilled plate and let it sit for a minute. Push it with your finger; if it holds its shape, you’re all set! If it’s too runny, let it simmer for a few more minutes.
-
Seal the Goodness: Once you’re happy with the consistency, remove it from the heat and let it cool slightly before ladling it into clean, sterilized jars. Make sure to leave some headspace at the top, then seal with lids. Your jam will be good to go!
Serving Suggestions
Now for one of my favorite parts: how to serve your delicious kiwi jam! To plate it up, simply spread a generous layer on your favorite toasted bread or bagel. Add a sprinkle of cream cheese or ricotta underneath for extra creaminess. If you’re feeling fancy, serve it alongside a cheese plate—wheels of brie, sharp cheddar, and a side of kiwi jam are a match made in appetizer heaven!
Recipe Variations
-
Kiwi-Strawberry Blend: Mash in some fresh strawberries for a vibrant twist.
-
Citrus Fusion: Use lime juice instead of lemon for a tropical flair.
-
Spicy Kick: Add a pinch of red pepper flakes for a surprising zing!
-
Herby Delight: Stir in some fresh mint or basil just before jarred for a herbaceous flavor.
-
Chia Jam: Make it even healthier by adding 1-2 tablespoons of chia seeds once the jam is removed from heat. It’ll add fiber and a bit of texture!
Chef’s Notes
I love that this kiwi jam has taken on a life of its own in my kitchen. Over the years, I’ve evolved the recipe from my grandmother’s original version. I’ve played with different fruit combos and spices, but I always find my way back to the simple beauty of pure kiwi. You can’t beat that bright, vibrant flavor! Don’t hesitate to make it your own—embrace experimentation, that’s truly where the magic lies.
FAQs and Troubleshooting
1. My jam is too runny! What did I do wrong?
- If your jam doesn’t thicken, it might need a bit more cooking. Just return it to the stovetop, simmer, and keep stirring until it achieves the right consistency.
2. How long will this jam last?
- Properly stored in the fridge in an airtight container, your kiwi jam can last for about 2–3 weeks. If you’re canning, follow proper canning procedures for longer shelf life.
3. Can I use other fruits in this recipe?
- Absolutely! Experiment with other fruits like peaches, berries, or even apples, but adjust sugar and lemon juice based on the sweetness and acidity of the fruit used.
4. What if I don’t have fresh kiwis?
- No worries! Use frozen kiwis, just make sure to thaw and drain them before starting the recipe for best results.
Nutritional Info
While I focused on flavor first and foremost, here’s a quick look at what your delicious kiwi jam packs in:
- Serving Size: 1 Tablespoon
- Calories: 50
- Sugar: 12g
- Fiber: 0.5g
And there you have it, friends! An easy kiwi jam recipe filled with nostalgic flavors and modern twists. So go ahead, gather your ingredients, roll up your sleeves, and bring this vibrant spread to your table. I promise, once you start making this jam, it’ll be hard to go back to store-bought! Let’s create some delicious memories together. Happy cooking!
PrintEasy Kiwi Jam
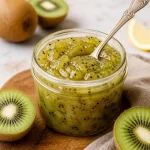
A delightful and easy kiwi jam recipe that is perfect for spreading on toast or pairing with cheese.
- Prep Time: 20 minutes
- Cook Time: 30 minutes
- Total Time: 50 minutes
- Yield: 4 servings 1x
- Category: Condiment
- Method: Stovetop
- Cuisine: International
- Diet: Vegan
Ingredients
- 2 Pounds Kiwis
- 2 Cups Sugar
- 1 Tablespoon Lemon Juice
Instructions
- Prepare the kiwis: Peel and chop into small chunks.
- Macerate the kiwis with sugar in a bowl and let sit for 30 minutes.
- Transfer the mixture to a pot, add lemon juice, and heat on medium.
- Simmer for 20–30 minutes, stirring occasionally.
- Check the consistency by dropping a spoonful onto a chilled plate.
- Seal the jam into sterilized jars once cooled slightly.
Notes
This kiwi jam can be paired with cheese or spread on toasted bread. Experiment with different fruits for variations.
Nutrition
- Serving Size: 1 tablespoon
- Calories: 50
- Sugar: 12g
- Sodium: 0mg
- Fat: 0g
- Saturated Fat: 0g
- Unsaturated Fat: 0g
- Trans Fat: 0g
- Carbohydrates: 13g
- Fiber: 0.5g
- Protein: 0g
- Cholesterol: 0mg
Keywords: kiwi jam, fruit spread, homemade jam, easy recipe, preserves