We’re Making Strawberry Jam: A Sweet Journey in the Kitchen
Welcome, fellow foodies! Today, we’re diving into a delightful homemade treat that can brighten up your breakfast, elevate your desserts, and even spark conversations at the brunch table: homemade strawberry jam. Is there anything better than spreading a generous layer of sweet, fruity goodness on your morning toast? I think not!
The beauty of making strawberry jam at home lies not just in the mouthwatering flavor but also in the simplicity and joy of creating it with your own hands. Trust me, after you make your first batch, you’ll begin to wonder why you ever settled for store-bought.
In my kitchen, strawberries bring a sense of nostalgia that I adore. We’ll talk about my first magical encounter with this fruit, the vibrant color it brings to your table, and how anyone can successfully craft this timeless spread without feeling overwhelmed. So, let’s dust off those jars and bring a little sweetness into our lives!
A Sweet Slice of Nostalgia
Let me share a little story that captures my love for strawberry jam. When I was a kid, summer vacation meant visiting my grandparents’ house out in the countryside. They had this luscious strawberry patch, filled to the brim with plump, juicy berries just begging to be picked. My grandma would call us outside with a warm smile, and we would race to the patch, baskets in hand.
The thrill of picking strawberries was something magical—tiny bursts of sweetness that stained our fingers and filled our memories. After a long day playing and picking, we’d return to the kitchen, where my grandma would work her magic. With the sweet aroma of fresh strawberries wafting through the air, she would transform our bounty into jars of jam that we would slather on biscuits and toast all summer long.
Those lazy summer afternoons were so much more than simple food; they were about connection, laughter, and the love wrapped in every jar. That’s why I’m thrilled to pass this tradition along—because making strawberry jam isn’t just about the process; it’s about creating new memories in your kitchen.
Ingredients
Let’s gather all the components to create your delicious strawberry jam! Here’s what you’ll need:
-
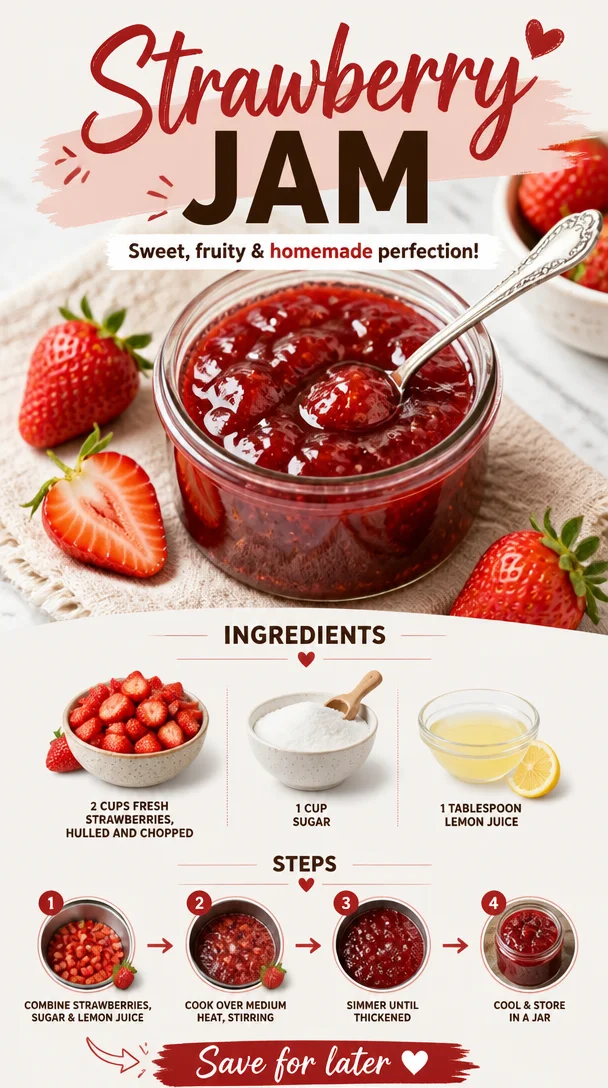
2 cups fresh strawberries, hulled and chopped
- Chef’s Insight: The fresher your strawberries, the more vibrant and flavorful your jam will be! Choose ripe ones for the best results. If fresh strawberries aren’t available, you can use frozen—just make sure to thaw and drain them first!
-
1 cup sugar
- Substitution Tip: If you prefer to cut calories or sugar, feel free to use a sugar substitute like Stevia, but keep in mind that it may change the texture slightly.
-
1 tablespoon lemon juice
- Chef’s Tip: This brightens up the flavor and helps with natural preservation. Fresh lemon juice is your best bet, but bottled works too in a pinch.
Before we start cooking, don’t forget to wash your hands and gather clean jars for storage. You want everything to be ready and welcoming—just like a warm hug from Grandma!
Step-by-Step Instructions
Step 1: Prepare Your Strawberries
First up, rinse your strawberries well under running water. Then, hull them—this just means removing the green tops and any tough bits. After hulling, chop them into delicious little pieces. The smaller the pieces, the more they will break down during cooking, giving you that perfect jam texture!
Step 2: Combine with Sugar and Lemon Juice
In a medium-sized saucepan, toss your chopped strawberries with 1 cup of sugar and 1 tablespoon of lemon juice. Stir to combine, and let those beauties sit for about 10-15 minutes. This step draws out the natural juices of the strawberries, creating a lovely syrup.
Step 3: Cook it Up
Place the saucepan over medium heat. As it heats, stir occasionally so the sugar dissolves completely. Once it starts to bubble gently, reduce the heat to low. Allow it to simmer for about 20-30 minutes. You’ll want to keep an eye on it and stir to avoid any sticking.
Step 4: Test for Consistency
As the mixture thickens, you’ll want to test its consistency. A simple trick is to place a teaspoon of the jam on a plate and pop it in the freezer for a minute. If it’s thick enough to hold its shape, it’s ready! If not, give it a bit more time.
Step 5: Jar It Up
Once your jam is thick and luscious, it’s time to jar it! Carefully pour your hot strawberry jam into pre-washed jars. Fill each jar, leaving about ¼-inch space at the top. This will allow for expansion if you ever decide to freeze it. If you want to be extra cautious, you can process the jars in a boiling water bath for 5-10 minutes for longer preservation.
Step 6: Let It Cool and Enjoy!
Allow your jars to cool on the counter. Once they’re cool, seal them up, and they’re ready to be stored in the fridge for a couple of weeks (or longer if processed). Just remember to label them—you’ll want to know what’s hiding in that fridge later!
Serving Suggestions
Now comes the fun part: serving it up! Your homemade strawberry jam will shine when slathered on freshly toasted bread or buttery biscuits. You can use it as a filling for cakes or pastries, swirl it into yogurt, or even spoon it over pancakes or waffles for an impressive brunch item.
And remember—presentation matters! A beautiful jar of jam makes a fantastic gift. Just tie a little twine around the top and add a handwritten label. Voila! You’ve got the perfect homemade gift.
Recipe Variations
Here are a few ways to switch things up and create your own unique strawberry jam experience:
-
Strawberry-Basil Jam: Add some finely chopped fresh basil during the cooking process for a surprising herbal twist!
-
Citrus Burst Jam: Toss in some orange or lime zest along with the lemon juice for a zesty kick.
-
Mixed Berry Jam: Combine strawberries with blueberries or raspberries for a delightful mixed berry jam.
-
Spiced Strawberry Jam: Add a pinch of cinnamon or a few cloves while cooking to warm up the flavor profile.
Chef’s Notes
As I mentioned, this recipe has evolved over time. Every summer, my strawberry jam skills get a little more refined. I’ve dabbled with so many variations—it’s one of my favorite things to share in my kitchen. Occasionally, I like to use less sugar or experiment with the acidity levels. And let’s not forget about the unpredictable nature of strawberries; sometimes you’ll bite into a berry and realize it’s more aromatic than the last batch!
Fun fact: Did you know that strawberries are not berries at all? They’re technically an “aggregate accessory fruit,” and the tiny seeds you see scattered on the outside are… seeds! Those quirky little facts always make a great conversation starter!
FAQs and Troubleshooting
1. My jam didn’t thicken. What did I do wrong?
Sometimes, if the strawberries were too watery or not cooked long enough, the jam may remain runny. Don’t worry! You can always cook it down for a bit longer until it reaches your desired consistency.
2. Can I use other fruits besides strawberries?
Absolutely! This basic recipe works well with all kinds of fruits such as peaches, peaches, or mixed berries! Adjust the sugar and acidity based on the fruit for the best flavor.
3. Can I store this jam at room temperature?
If you’ve processed your jars correctly in a boiling water bath, they can be stored at room temperature until opened. However, if you’re keeping them unprocessed, they should go in the fridge and be consumed within a couple of weeks.
4. Can I skip the sugar?
You sure can! If you’re looking for a sugar-free version, consider using a sugar replacement like Stevia or erythritol. Just be mindful that it may change the texture and flavor profile slightly.
Nutritional Info
While I don’t have the exact nutritional data, here’s a general idea per tablespoon of strawberry jam (made from this recipe):
- Calories: ~50
- Sugars: ~13 grams
- Fiber: ~0.2 grams
Homemade jam may vary greatly based on your specific ingredients and amounts.
And there you have it! Your very own strawberry jam, ready to spread sweetness into your life. I hope you enjoyed this delicious journey as much as I did. Grab a jar, share it with friends, and remember—every bite holds a sprinkle of joy and a dash of love. Happy cooking, my friends!
PrintHomemade Strawberry Jam
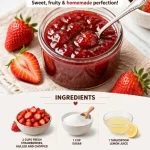
A delightful homemade strawberry jam recipe that captures the sweetness of summer berries in every jar.
- Prep Time: 15 minutes
- Cook Time: 30 minutes
- Total Time: 45 minutes
- Yield: 4 servings 1x
- Category: Spread
- Method: Canning
- Cuisine: American
- Diet: Vegetarian
Ingredients
- 2 cups fresh strawberries, hulled and chopped
- 1 cup sugar
- 1 tablespoon lemon juice
Instructions
- Prepare your strawberries by rinsing them well under running water, hulling, and chopping them into small pieces.
- Combine chopped strawberries with sugar and lemon juice in a medium-sized saucepan; stir to combine and let sit for 10-15 minutes.
- Cook the mixture over medium heat, stirring occasionally until it starts to bubble; reduce heat to low and simmer for 20-30 minutes.
- Test the consistency by placing a teaspoon of jam on a plate and freezing for a minute; if thick enough, it’s ready.
- Jar the hot jam into pre-washed jars, leaving about ¼-inch space at the top, and optionally process the jars in a boiling water bath for longer preservation.
- Let the jars cool on the counter, seal them, and store in the fridge.
Notes
For a unique twist, try adding basil, citrus zest, or even spice to your jam. Serve it on toast, in desserts, or as a thoughtful gift.
Nutrition
- Serving Size: 1 tablespoon
- Calories: 50
- Sugar: 13g
- Sodium: 0mg
- Fat: 0g
- Saturated Fat: 0g
- Unsaturated Fat: 0g
- Trans Fat: 0g
- Carbohydrates: 14g
- Fiber: 0.2g
- Protein: 0g
- Cholesterol: 0mg
Keywords: strawberry jam, homemade jam, canning, summer recipes, fruit preserves